I find connections among books, art, music, libraries, travel, crafts and food.

Saturday, October 5, 2013

Romaunt Version of the Gospel According to St. John, 1848

  The last book in the World Languages Bibles Collection at St. Olaf College, caught my eye, not for its outward beauty (it's plain and has been "mended")
but for the look of its language and that it says it was written in "Provencal". The text had almost a medieval Latin language look to it, but maybe a cross with Spanish or French. The word Romaunt seemed similar to Romance so I did some research to see what it was. Merriam-Webster says Romaunt is Middle English from the Old French romant, first known use in 1530 AD. Inside the front cover of this book is a typed paper explaining Romaunt and the text itself:
Here it says that Romaunt is Gallic (French) and that this was the first vernacular translation of the Gospel of John condemned by the Catholic Church, probably originally written in the 12th century. It seems like the Romaunt language was a common Romance language spoken in France in the region of Provence.

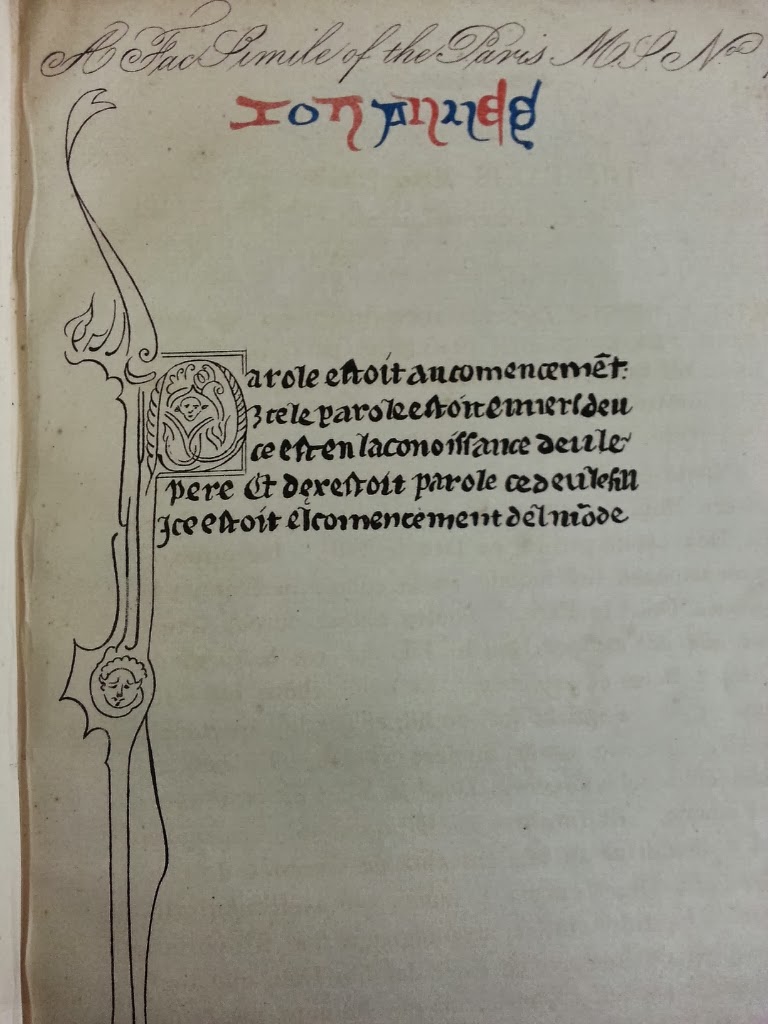
Now, this particular printed volume has a copyright date of 1848, as does the one at St. Olaf.  A quick search online shows other libraries to hold the same version. The University of Chicago has copy # 8086  and you can read the whole book online! The page opposite the title page has written, in beautiful script, "A FacSimile of the Paris MS No 8086". The copy at St. Olaf says it is No.7268. So in 1848 there must have been a huge print run of these. Here is a not great photo of the text, but you can see the pretty hand drawn script and doodles. There are a few more of these throughout the book, and in color, well, red and blue ink.
Better pics here from Lt. Colonel Dave:
  One more point of interest from that typed sheet inside the cover is that it mentions the Waldenses, "the only dissenters from the Catholic church in the middle ages that continue to live". So, who were the Waldenses? A quick search at Encyclopaedia Brittanica gave me quite a bit of information about them. Basically, they began as a sect in southern France that aspired to follow Christ in poverty and simplicity. Followers of this church wanted to be able to read the Bible in their vernacular tongue, and so it was translated into Romaunt. Here is another interesting text about the Waldenses, written by 
J. A. Wylie (1808-1890)

Saturday, September 28, 2013

Archives are cool

Archives are cool, right?


So here is the vault for Special Collections at Rolvaag Library, St. Olaf College. (BTW, that's Ole Edvart Rølvaag  author of Giants in the Earth, who roomed with my grandpa, Hjalmar S. Froiland, at St. Olaf in the 'aughts.)

What's not to love about really old beautiful books and compact library shelving where you get to turn the crank to move the shelves? But wait, there's more --

     Look at this beautifully carved book cradle. This (and other ones that are clear acrylic - useful but unattractive) are used for patrons wishing to look at books in the vault. The cradle helps protect the rare book from being opened too wide, and provides a convenient resting place for the book while it's being .read
Why are card catalogs still so appealing? 

I love them. 
They were made sturdy, useful, and of beautiful wood. I have a 36 drawer catalog myself, in which I keep craft supplies.

 Then there are these amazing calf or goat skin covered volumes well over 150 years old. I love looking at the pages of these because the paper is so surprisingly white and quite sturdy. Paper used to be made of cotton rag, which has longer fibers and lacks the acid content of 50 year old wood pulp paper.

  I like the mystery of the acid-free "boxes" in which the more deteriorated books are kept. I used to make these, when I worked in the Preservation lab at UW-Madison, for items to be kept in original bindings, preventing them from excessive deterioration.

  I also am fond of the cotton "tape" used to hold a book together. There are a couple of other "tapes" used in book repair that are non-adhesive: linen tape on which to sew signatures, and tape for headbands.

The calfskin was a good choice for covers because it retained its color and remained supple for centuries.

Wednesday, September 18, 2013

The Vault

World Languages Bibles in the St. Olaf College Vault

     I'm thrilled to get to work a bit in the Library Special Collections at St. Olaf College, my alma mater (where I was a Latin major, can you tell?)  Above you see just a few pretty tomes in Norwegian and Africaans. 
     The collection of World Languages Bibles in the St. Olaf College Vault contains 248 full or partial Bibles in many languages, some of which no longer exist (such as Old English). There are Bibles in many Native American languages including Ojibwa, Arawak, and Micmac.
     My goal is to find out and tell the story of how the collection came together. My next step is to get my hands on the book

The Norlie collection of English Bibles / by Olaf Morgan Norlie

because a large number of these Bibles were donated by, and have bookplates designating, O. M. Norlie. So, apparently, Olaf wrote a book about his collection. 
     I'll keep you posted on what I find out. 


Sunday, April 21, 2013

Pamphlet Stitch Binding

In bookbinding, the Pamphlet Stitch is the simplest to learn, and has great potential for creating many types of beautiful and interesting books.


 Fold your cover paper and text block, making sure the direction of the grain is along the spine. I have a handy hole poker. It's best to poke the holes from the inside out, and use a ruler to make your holes evenly spaced.


You will be stitching through most of the holes twice, making crazy 8s through the paper. You can vary the way your binding looks by where you start your stitch - inside or out, middle, top, or bottom. I like to use a variety of found threads. One of my favorite is colored crochet thread, as you see in the photo below.


You can see that I started the sewing on the inside of this book; the outside has a clean finished look, thread coordinating with cover paper.


Below is the inside and outside of a 3-hole pamphlet stitch, with the beginning and ending stitches on the outside. This was a book of poetry my daughter made in 8th grade.


This was a fun, simple project I did with my Girl Scout troop. We made a simple pamphlet book, adding beads as decoration on the outside.


This is an example of a wedding invitation set that I made. I used pretty endsheet paper that had ripped bits of sheet music. I used a pamphlet stitch with gauzy ribbon as the thread.


I don't know why I like tiny things so much, but I have made tons of these mini pamphlet books, using them as gift cards or giving them to little nieces and nephews. The one on the right is a matchbook fold. You can make them in a 4 x 6 size, with a really long string that you can wear around your neck.


My cousin made this pretty pamphlet, which has a picture of his mother on the front, and some stories he wrote about her.


And finally, here is an example of a Two-Section Pamphlet Stitch Binding. You make a pleat in the cover, so if you set the cover out by itself, it would form a "W" shape. You sew a section onto each folded spine piece.   I also folded the paper so that it made a pocket on the inside front and back of the book.

 Here is the finished travel book. It is a very simple pamphlet stitch, where I cross over stitches from each section.
Find these stitch samples and more in the instructional book Non-Adhesive Binding: Books without Paste or Glue, by Keith A. Smith.


Wednesday, April 17, 2013

Brian Selznik, author and illustrator

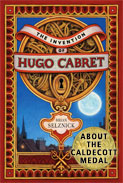
You will know Brian Selznik from his amazing book, The Invention of Hugo Cabret
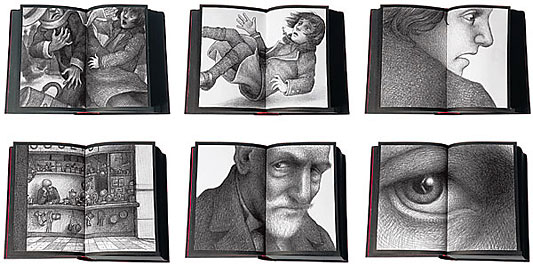
I was first drawn to this book when I saw it going through the reserves at our library. I was attracted to the art and the size of book - it is substantial, 533 pages, but holdable (about 5 x 8 inches). I flipped through it and fell into the design of it, how there are many pages with just drawings, almost like a flip book bringing you closer and closer to an image. I found the drawings to have a Maurice Sendak quality.

The book is set in Paris in 1931 and is about a 12 year old orphaned boy who is the secret clock winder at a busy train station. His early life unfolds and we are drawn in by the events in the book which lead to uncovering old secrets about his father, a toy shop keeper and an early film maker, Georges MĂ©liès.

Martin Scorsese must have really enjoyed the book, as well, which inspired him to make a major motion picture starring Ben Kingsley.

I first saw Brian Selznik's art in a series of books my daughter brought home from the library, called The Doll People by Ann M. Martin and Laura Godwin. My daughter highly recommends this book and its sequels, The Meanest Doll in the World and the Runaway Dolls, and I highly recommend the art.

I was very excited when I started seeing another book by Brian Selznik going the reserves at the library. This one is called Wonderstruck. You can watch a book trailer by Brian.


The first thing I loved about this book is that it starts out in my home state of Minnesota, near Gunflint Lake in NE MN. It is the story of Ben, who ends up making his way to The American Museum of Natural History in NYC. The story is paralleled 50 years earlier with a girl named Rose, and we find how Ben's and Rose's stories interweave.

The pictures, as always, are incredible. And the story is an adventure and a mystery.

But the book also brought me back to one of my favorite childhood books, From the Mixed-up Files of Mrs. Basil E. Frankweiler, by E. L. Konigsburg, another story that has kids sleeping overnight in a museum. How fun would that be? I'd still like to do it. Or NY Public Library. (My family always calls me the Violator...) Or MOMA, hey Tilda Swinton did it.


Look at this fun cover:


In any case, It's another fun story and great illustrations by author/illustrator Brian Selznik. Find all his books and more at your local public library

Tuesday, April 16, 2013

Secret Accordion Fold Book


I love to make these little Accordion Fold books with scraps of pretty paper. They are especially fun to make with kids, because they are a do-able project in a reasonable amount of time before the kids get bored. Kids also like the "secret" aspect to them. When you remove the spine, there is a "whole 'nuther" book in which to write secrets.

You'll need scraps of pretty paper, and strips of paper to fold into an accordion for the pages of the book. I like to determine the book size by the size of the paper strip. In the bottom left of this you can see that my book will be card catalog size.

A Word About Paper Grain
When folding paper for book binding, it is important to make sure you are folding along the grain of the paper. If you don't, the paper won't fold well, and the fold will cause stress along the spine, making the book bend or buckle, or the spine less strong. 

There are a number of ways to tell which direction the grain runs on a piece of paper. For smallish pieces, You can first just try folding it in each direction. The neater fold shows you the direction of the grain. 
Here are two sheets of the same type of paper, folded in opposite directions.
   The top sheet is folded against the grain - you can tell because it does not make a neat crease; it is wobby.
The bottom sheet is folded with the grain - you can tell because it folds completely and neatly.


Here is a second way to tell the grain - you can try this with a piece of newspaper. Rip it one direction, then rip it the other. When you rip it with the grain, it rips in a neat line. When you rip against the grain, your rip will be wobbly and uneven.
Here is a video showing how to check the grain, and a third method with water.

Back to the Accordion Fold book:
Fold your strip of paper into even sections, front and back ending in the same direction. The inside pages of a book are called the text block.                                                                        Make sure, when pages are folded, that all four edges are even. 
Then you will fold your cover pieces. You need 2 pieces exactly the same height as the text block, but at least 2 inches wider. You need 2 contrasting pieces exactly the same width as the text block but at least 2 inches taller. Fold the 4 pieces so that they each are exactly the same size as the text block. Now you are going to create your covers.
Tuck the folded sides of two contrasting cover pieces into each other.


When you have each of the covers made, you can insert the end page of your text block into each cover:
 One more piece, now, the Spine.
  
And here's the secret back side where you can hide things like your favorite kitty picture.
And here are some lovely Non-Adhesive Accordion Fold Books: